Introduction
Wireless signal relay is generally used to extend the coverage range of wireless signals and enhance signal strength. The goal is to extend the effective distance by receiving wireless signals and retransmitting them to a farther place. Generally, when relaying wireless signals, the relay first receives the signal from the wireless signal source, and the enhanced signal is retransmitted to cover a larger area.
Although wireless signal relay can be easily realized with tools like GNU Radio, this article intends to achieve the relay method in a playful way.
Note: This experiment is for entertainment and appreciation only, as this experiment has not solved the delay problem and cannot guarantee the relay effect. Please read the following text with a non-strict attitude and non-scientific spirit.
The code written for the experiment has been organized intoRF-Relay, do not use it for illegal purposes.
The concept verification of RF-Relay using HackRF devices for relay wireless signal experiments cannot guarantee communication efficiency.
byclient-rxandserver-txThe two programs constitute the theme. Among themclient-rxReceived wireless signals are sent toserver-tx,server-txReceived data is sent out through HackRF.
Cautionary notes
Ensure
client-rxandserver-txRunning in a network environment that can be互通, that isserver-txThe IP and port can be accessed byclient-rxAccess, first runserver-txAfter runningserver-tx.
Need to use when running the program
sudopermissions.Can be modified by
client-rxandserver-txThe frequency parameter of the hackrf command in
Experimental principle
server-tx
server-txAfter the program starts, first parse the command line arguments to get the listening IP and port.Create a named pipe
/tmp/pipetx.ipc, used to store data received from the client.Start a Goroutine to execute
hackrf_transferCommand, send the data in the named pipe through the HackRF device.The main thread opens the named pipe and listens on the specified IP and port.
Accept client connections, read data from the TCP connection, and write it to the named pipe.
client-rx
client-rxAfter the program starts, first parse the command line arguments to get the server's IP and port.Create a named pipe
/tmp/piperx.ipc, used to store data received from HackRF.Start a Goroutine to execute
hackrf_transferCommand, receive wireless signals from the HackRF device and write data to the named pipe.The main thread opens the named pipe and connects to the server.
Data is read from the named pipe and sent to the server through TCP.
client-rxReceived wireless signals are transmitted toserver-txand then retransmit through the HackRF device to achieve signal relay.
Hardware requirements
The following hardware devices are required:
Two PCs or virtual machines: One is used to run
client-rx, another one is used to runserver-tx, need to be in the same network (network interoperability is sufficient).Two HackRF One devices: Each PC or virtual machine is connected to one, used for receiving and sending wireless signals.
Installation steps
1. Install basic software environment
Install the following basic software on each PC or virtual machine:
Go: Requires installation of Go 1.18 or higher version.
HackRF Tools: Can be installed using the following command:
sudo apt update
sudo apt install hackrf
Git: Used to clone the code repository
sudo apt install git
2. Clone the code
The code repository is stored at:
git clone https://github.com/quark9981/RF-Relay.git
3. Verify HackRF installation
Verify whether the HackRF device on each host or virtual machine is ready.
Check if the HackRF tool is installed
hackrf_info
If the environment is ready, the above command will print the information of the HackRF device separately.
Check HackRF device connection
lsusb
If the environment is ready, the above command will output the interface information of the HackRF device.
4. Start RF-Relay
Build separatelyclient-rxandserver-tx:
Buildclient-rx
cd client-rx
go build -o client-rx main.go
Buildserver-tx
cd server-tx
go build -o server-tx main.go
Use
Startserver-tx
Inserver-txRun the following command in the directory where you are located:
sudo https://www.freebuf.com/articles/wireless/server-tx -i <server-ip> -p <server-port>
For example:
sudo https://www.freebuf.com/articles/wireless/server-tx -i 192.168.1.2 -p 8080
Startclient-rx
Inclient-rxRun the following command in the directory where you are located:
sudo https://www.freebuf.com/articles/wireless/client-rx -i <server-ip> -p <server-port>
For example:
sudo https://www.freebuf.com/articles/wireless/client-rx -i 192.168.1.2 -p 8080
Ensure that the two PCs are on the same network.
5. Test
If everything is normalclient-rxandserver-txOK output will be displayed later.
client-rxAfter the relay is completed, the output similar to the following is displayed:
RX OK
server-txAfter the relay is completed, the output similar to the following is displayed:
TX OK
6. Data
The experimental topology is as follows
During the experiment, two HACKRF One tools were connected to two virtual machines respectively, and the running effect is shown in the figure below
To confirm whether the signal relay is completed, the experiment relayed the 433.92MHz band signal data to the 315MHz band (only for demonstration purposes, not strictly accurate).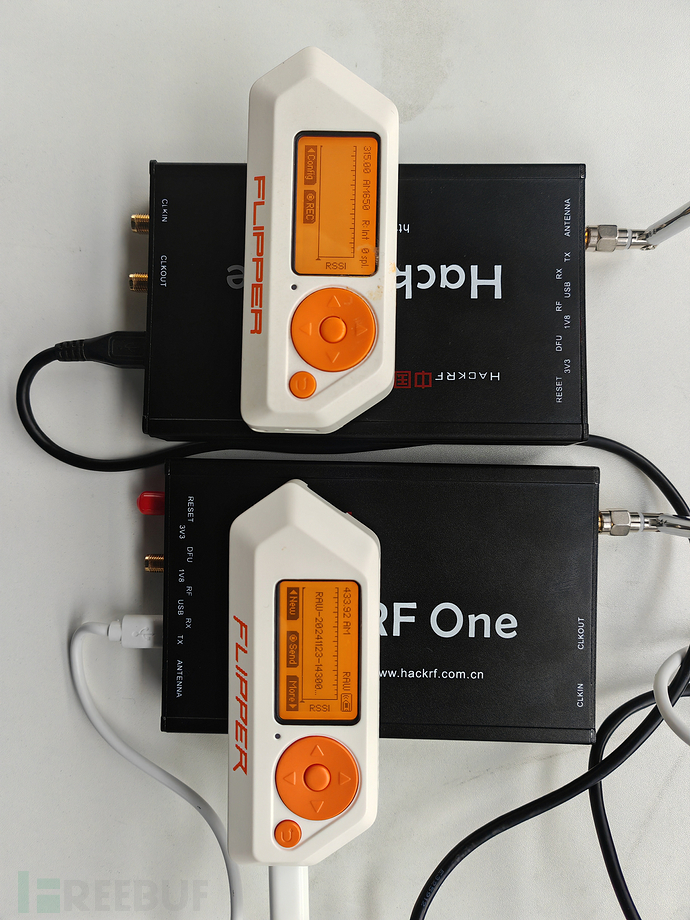
中继效果如下

评论已关闭