Author of this article: uiop@360SRC
With more and more articles using eBPF, unfortunately, I don't have a high-version phone at hand and can only use the development version for experience. After falling into many pitfalls, I record the simple usage process.
I. Introduction to ebpf

eBPF is a revolutionary technology that originated from the Linux kernel and can run sandbox programs in the kernel of the operating system. It is used to safely and effectively extend the functionality of the kernel without changing the kernel source code or loading kernel modules.
eBPF allows sandbox programs to run within the operating system, so application developers can dynamically add additional features to the operating system at runtime. Then, the operating system ensures safety and execution efficiency, just like local compilation is performed with the help of JIT compilers and verification engines. eBPF programs are portable between kernel versions and can be automatically updated, thus avoiding workload interruption and node restarts.
How ebpf works
eBPF programs are executed by the kernel when events are triggered, so they can be considered as a form of function hook or event-driven programming. The value of running on-demand eBPF programs from user space is relatively small because all on-demand user calls have already been processed through normal non-VM kernel API calls (‘syscalls’), and the value brought by VM bytecode here is very small. Events can be generated by kprobes/uprobes, tracepoints, dtrace probes, sockets, etc. This allows hooks and checks to be inserted and checked in the instructions of the kernel and user processes, such as memory of any function, intercepting file operations, checking specific network packets, etc.
Steps to run eBPF programs
The user space sends bytecode and program type to the kernel together, the program type determines the kernel area that can be accessed (mainly various subsets of BPF auxiliary functions).
The kernel runs a verifier on bytecode to ensure that the program can run safely (kernel/bpf/verifier.c).
The kernel compiles bytecode into local code and inserts (or attaches) it to the specified code location. (If JIT functionality is enabled, bytecode is compiled into local code).
The inserted code writes data to a circular buffer or a general key-value map.
The user space reads the result value from a shared map or circular buffer.
High-level components of eBPF programs
Backend: This is the eBPF bytecode loaded and run in the kernel. It writes data to the data structures of the kernel maps and circular buffers.
Loader: It loads bytecode backend into the kernel. In most cases, when the loader process terminates, the bytecode will be automatically unloaded by the kernel.
Frontend: Read data from data structures (written by the backend) and display it to the user.
Data structures: These are the means of communication between the backend and the frontend. They are maps and circular buffers managed by the kernel, accessible via file descriptors, and need to be created before the backend is loaded. They will continue to exist until there are no more backend or frontend read/write operations.
2. Why choose eBPF
The main purpose of the Linux kernel is to abstract hardware or virtual hardware and provide a consistent API (system call) that allows applications to run and share resources. To achieve this goal, it is necessary to maintain a large number of subsystems and layers to distribute these responsibilities. Each subsystem usually allows some level of configuration to meet the different needs of users. If the required behavior cannot be configured, the kernel needs to be changed, and historically, there are two options:
Native support
Change the kernel source code and persuade the Linux kernel community that changes are needed.
Wait for years for a new kernel version to become commercial.
Kernel modules
Write kernel modules
Regularly fix it, as each kernel version may break it
There is a risk of damaging the Linux kernel due to the lack of security boundaries
With eBPF, a new option can be used to reprogram the behavior of the Linux kernel without changing the kernel source code or loading kernel modules. In many ways, this is very similar to how JavaScript and other scripting languages unlock the evolution of the system, making system changes difficult or expensive.
3. Environment setup on the development version
Environment setup
Use armbian system version for rk3588 development + redroid as the development environment
Flash the latest armbian system according to the official wiki
https://wiki.radxa.com/Rock5/5b/getting_started
Use redroid on armbian (the new armbian kernel can use redroid directly, as well as cuttlefish)
Install docker
$ sudo apt-get update
$ sudo apt-get upgrade
$ curl -fsSL test.docker.com -o get-docker.sh && sh get-docker.sh
$ sudo usermod -aG docker $USER
$ docker run -itd --rm --privileged \
    --pull always \
    -v ~/data:/data \
    -p 5555:5555 \
    redroid/redroid:12.0.0-arm64
Compile the kernel with ebpf support (if it is Ubuntu, you can compile according to the official tutorial)
Download the dependency packages
$ sudo apt-get update
$ sudo apt-get install -y git device-tree-compiler libncurses5 libncurses5-dev build-essential libssl-dev mtools bc python3 dosfstools bison flex rsync u-boot-tools make
Install python2
$ cd /usr/local/lib/
$ sudo wget https://www.python.org/ftp/python/2.7/Python-2.7.tgz
$ sudo tar -zxvf Python-2.7.tgz
$ sudo ln -snf /usr/local/lib/Python-2.7/python /usr/bin/python2
Download the kernel and modify the configuration to support ebpf
$ sudo apt install linux-source-5.10.110-legacy-rockchip-rk3588
$ mkdir kernel
$ cd kernel/
$ tar -xf /usr/src/linux-source-5.10.110-rockchip-rk3588.tar.xz
$ sudo xz -d /usr/src/linux-rockchip-rk3588-legacy_5.10.110_23.02.2_config.xz
$ cp /usr/src/linux-rockchip-rk3588-legacy_5.10.110_23.02.2_config .config
$ make mrproper
$ nano .config
Modify the following configuration
CONFIG_IKHEADERS=y
CONFIG_ASHMEM=y
CONFIG_ANDROID_BINDERFS=y
CONFIG_KPROBES=y
CONFIG_KRETPROBES=y
Start compiling
$ make -j8
$ sudo make modules_install
$ sudo make install
$ cd /boot/
$ sudo mv Image Image.old
$ sudo ln -s vmlinuz-5.10.110 Image
Finally, restart
Error resolution
If warning errors lead to errors, forbidden warnings
kernel/scripts/gcc-wrapper.py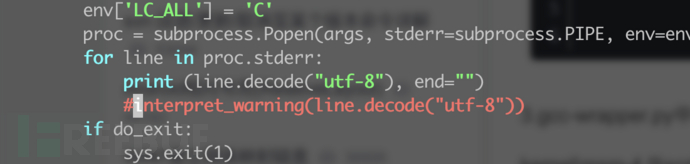
IV. Set up ebpf development environment
1. Switch docker's bridge network mode to macvlan
Create macvlan and note that you need to modify the subnet and network card name to your own
$ docker network create -d macvlan --subnet=192.168.0.0/24 --gateway=192.168.0.1 -o parent=enP4p65s0 -o macvlan_mode=bridge mymacvlan
Reallocate IP and start redroid
$ docker run --net=mymacvlan --ip=192.168.0.100 -itd --rm --privileged \
    -v ~/data:/data \
    redroid/redroid:12.0.0-latest \
    androidboot.redroid_width=1080 \
    androidboot.redroid_height=1920 \
    androidboot.redroid_dpi=480
2. Set up the bcc development environment based on the following two articles
https://blog.seeflower.dev/archives/138/
https://blog.seeflower.dev/archives/111/
Modify the configuration differences
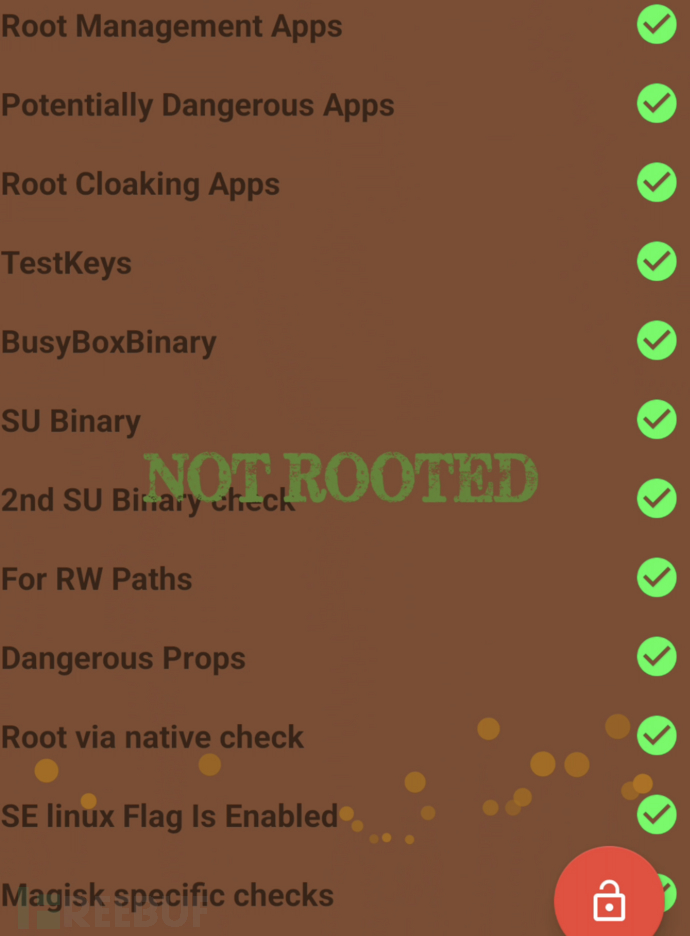
3. You can achieve such an effect in the end
V. Simple Experience with bcc
1. Execute execsnoop to view the detection points of rootbeer

2. Write an ebpf program and bypass root detection
In simple terms, you can bypass detection by modifying the system call parameters directly on the exec basis
Reference:
https://blog.seeflower.dev/category/eBPF/
https://ebpf.io/zh-cn/what-is-ebpf/

评论已关闭